
Documentation
OPS User Guide — Orchestra & Music School Software
Everything you need to get the most out of OPS orchestra management and music school software — from your first score upload to generating financial reports.
Getting Started
After your administrator creates your account and sends you an invite email, you can log in at app.ops-music.com. The first time you sign in you will be guided through a short setup wizard if your organisation has not been configured yet. OPS supports three languages (English, French, German) and each user can independently choose their preferred language.
What you can do
- ✓Accept your invite email and set a permanent password via the reset link
- ✓Complete the organisation setup wizard: name, address, short ID (used in archive numbers), and preferred language
- ✓Invite your team — only administrators can create user accounts
- ✓Assign module-level permissions to each user (none / read / write / administer)
- ✓Optionally create member groups and assign permissions to the whole group at once
- ✓Switch the UI language at any time from your profile settings (English, French, German)
- ✓Each user's language preference is stored individually — your team can work in different languages simultaneously
- ✓All generated documents (contracts, invoices, report cards) are stamped with your organisation's short ID and an incrementing archive number
Key workflow
- 1
Open invite email
Click the link and set your password. The link expires after 24 hours — ask your admin to re-send if needed.
- 2
Log in
Visit app.ops-music.com and sign in with your email and new password.
- 3
Complete setup (admin only)
Fill in your organisation name, address, and a short ID such as 'MYORCH' — this prefix appears on all generated documents.
- 4
Invite your team
Go to Administration > Users > Add User. Each person receives an invite email with a temporary password.
- 5
Set permissions
In Administration > Permissions, choose a level (read / write / administer) per module for each user or group.
- 6
Configure email (optional)
In Administration > Mail, enter your SMTP credentials so OPS can send invite emails and notifications.
💡 Tips
- —Create a member group (e.g. 'Committee') and assign permissions to the group — everyone added to that group automatically inherits those permissions.
- —The admin role bypasses all module restrictions. Reserve it for people who truly manage the platform.
- —If a user forgets their password, an admin can trigger a new invite email from Administration > Users without deleting the account.
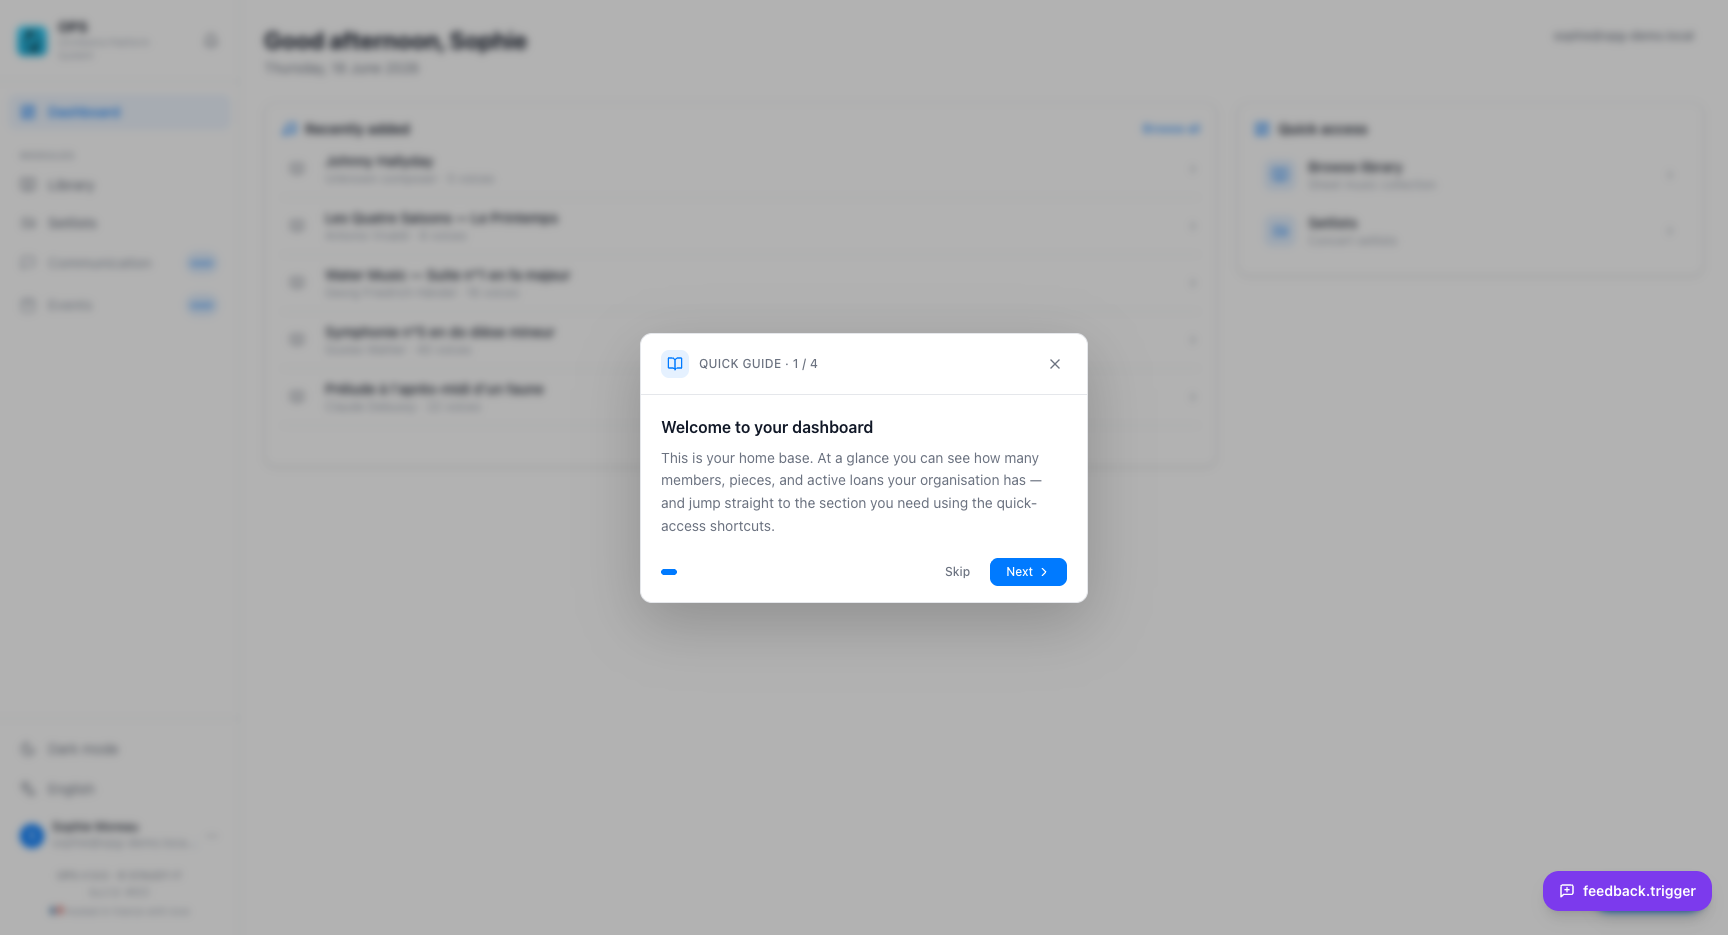
Score Library
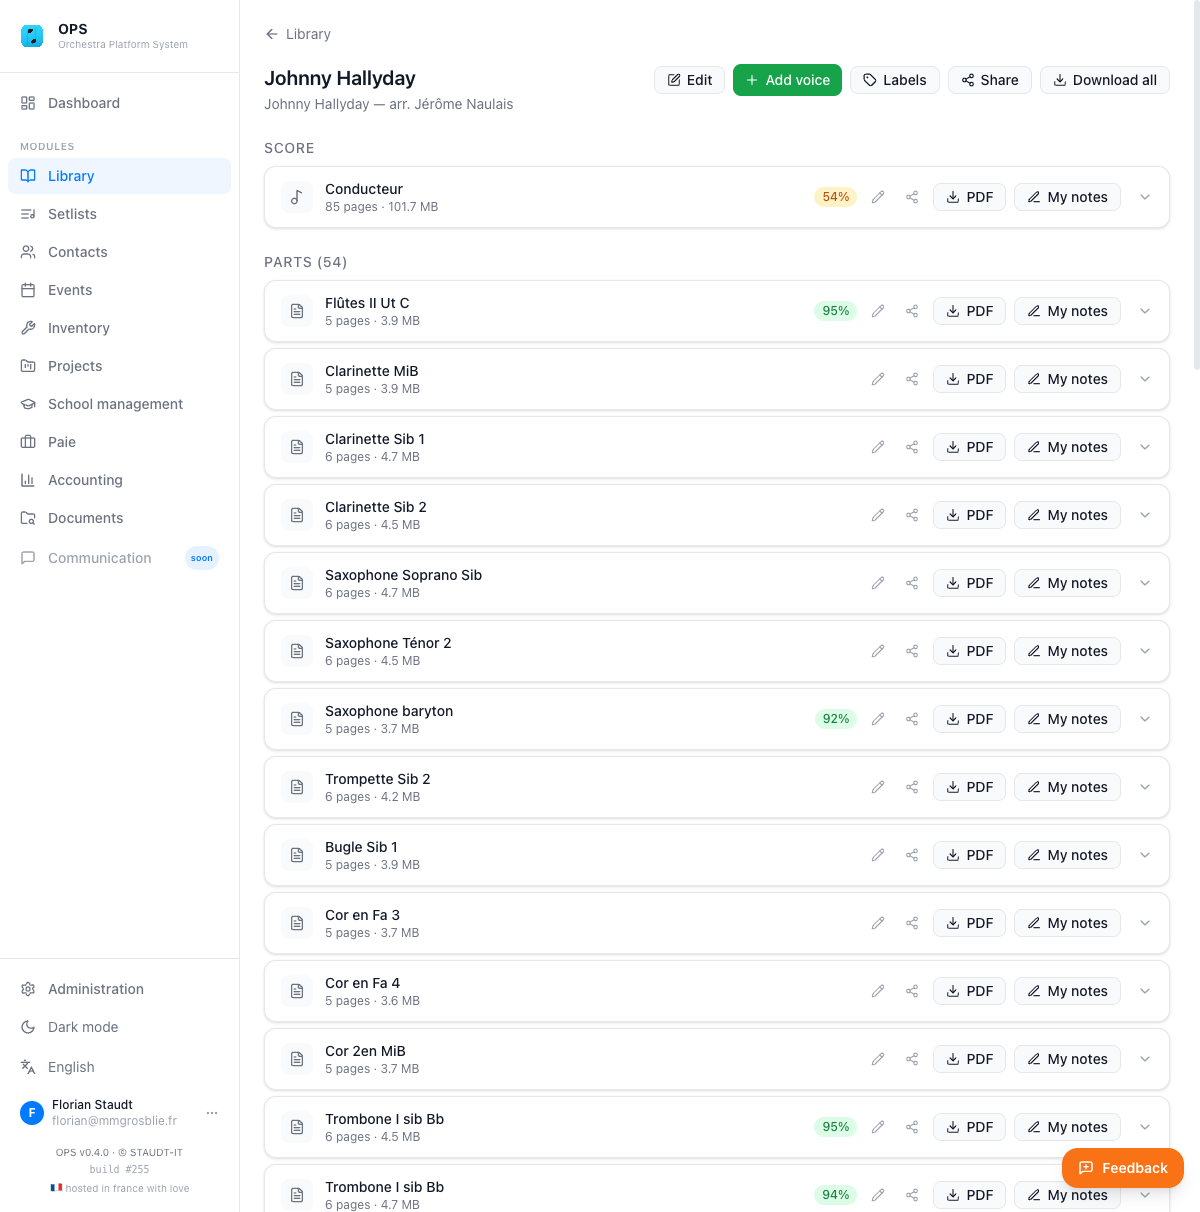
The Score Library is the heart of OPS. Upload your entire sheet music collection as PDFs and let the built-in OCR engine automatically identify and split each instrument part. Every piece is searchable, shareable, and downloadable in seconds — no manual splitting required. A QR code on each exported document links it back to the original file in the system for full traceability.
What you can do
- ✓Upload a full-score PDF — OPS automatically splits it into individual instrument parts using OCR
- ✓Upload a pre-split ZIP file if your parts are already separated
- ✓Review and correct any auto-detected voice names before saving
- ✓Mark one voice as the conductor score — it appears first in all export lists
- ✓Organise pieces with colour-coded labels (e.g. 'Baroque', 'Difficult', 'New Acquisitions')
- ✓Switch between Personal (only you) and Organisation (everyone) scopes
- ✓Download any individual part or the entire piece as a ZIP in one click
- ✓Share a piece via a public link — recipients need no account to download any part
- ✓Every exported document is stamped with an archive number and QR code for physical tracking
- ✓Rename all voice files at once if you change the organisation language
- ✓Search across all pieces and voices instantly — title, composer, label, or voice name
Key workflow
- 1
Click Upload
Choose a PDF (full score or single part) or a ZIP of pre-split PDFs.
- 2
Wait for OCR
A progress bar appears while the system analyses the file. For a large multi-part score this may take 30–60 seconds.
- 3
Review voices
OPS lists all detected parts with their suggested names (e.g. 'Flute 1', 'Trombone'). Correct any mis-detection and mark which part is the conductor score.
- 4
Set scope
Choose Personal to keep the piece private, or Organisation to make it available to the whole ensemble.
- 5
Add labels
Attach one or more labels to help categorise the piece. Labels can be created and colour-coded on the fly.
- 6
Save
The piece is now searchable. All parts are stored and can be downloaded individually or as a bundle.
- 7
Share (optional)
Click the share icon to generate a public link. Set an expiry date if needed — the recipient accesses a read-only page with per-voice download buttons.
💡 Tips
- —Use the scope filter ('All / Personal / Org') in the library list to quickly find your private uploads.
- —Share tokens can have an expiry date — set a far-future date for permanent access.
- —If you change the organisation language (e.g. from English to French), OPS offers to rename all voice files automatically.
- —Labels work like tags — a piece can have multiple labels. Filter by label in the library to instantly narrow the list.
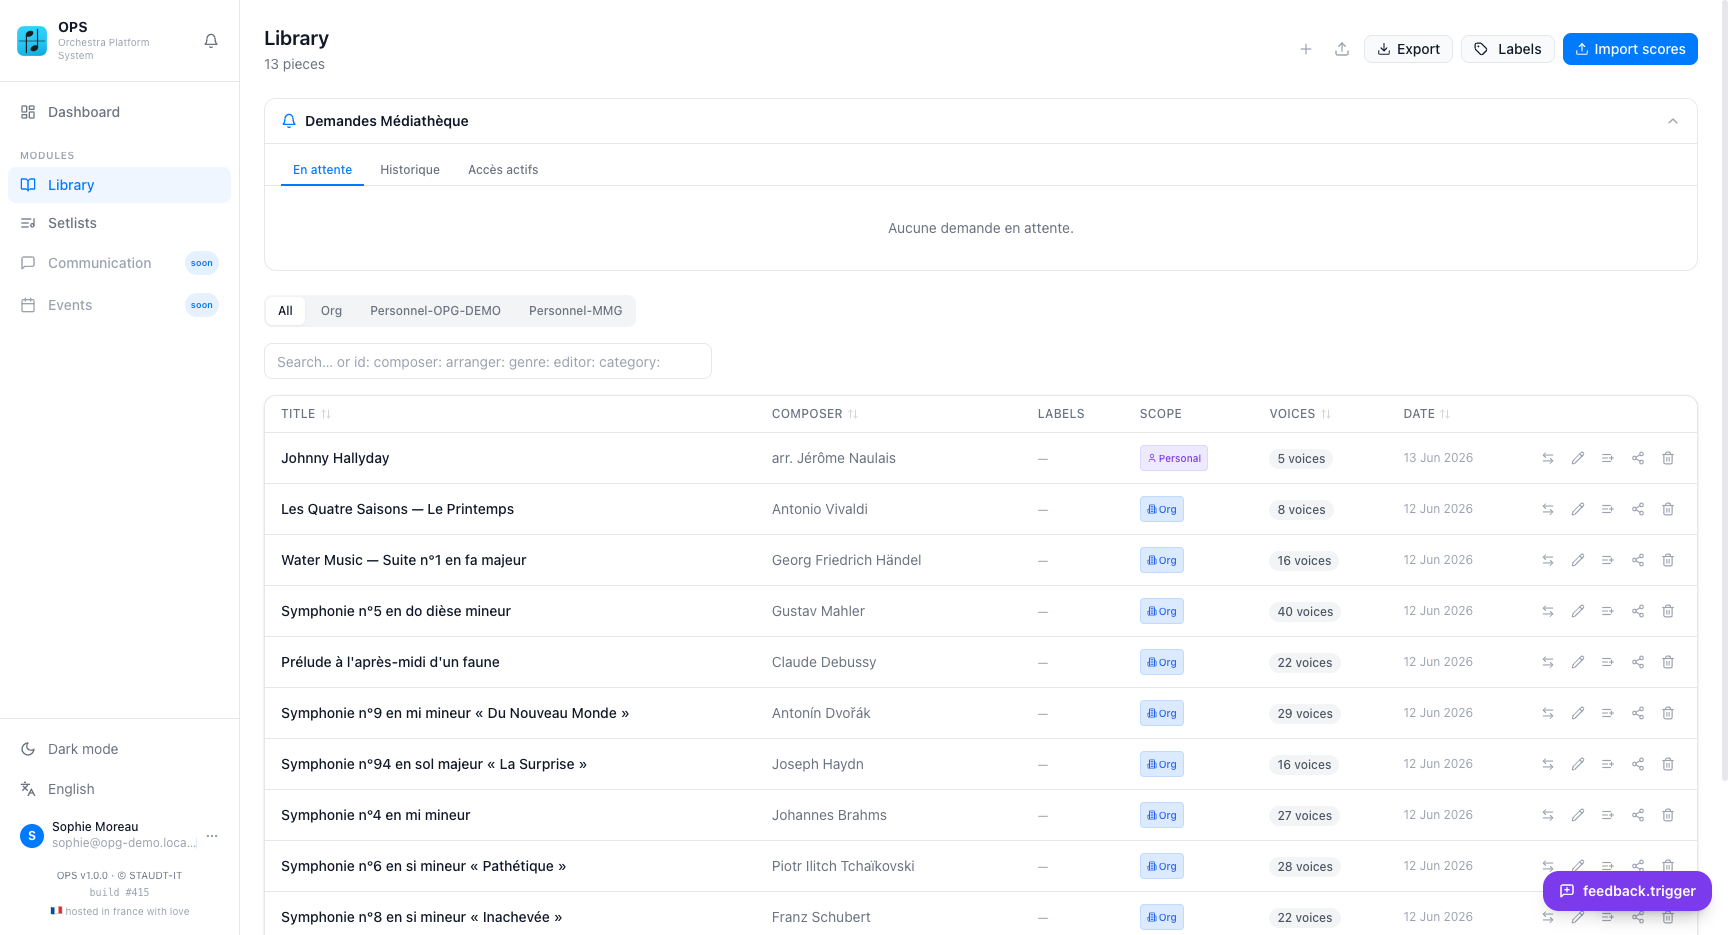
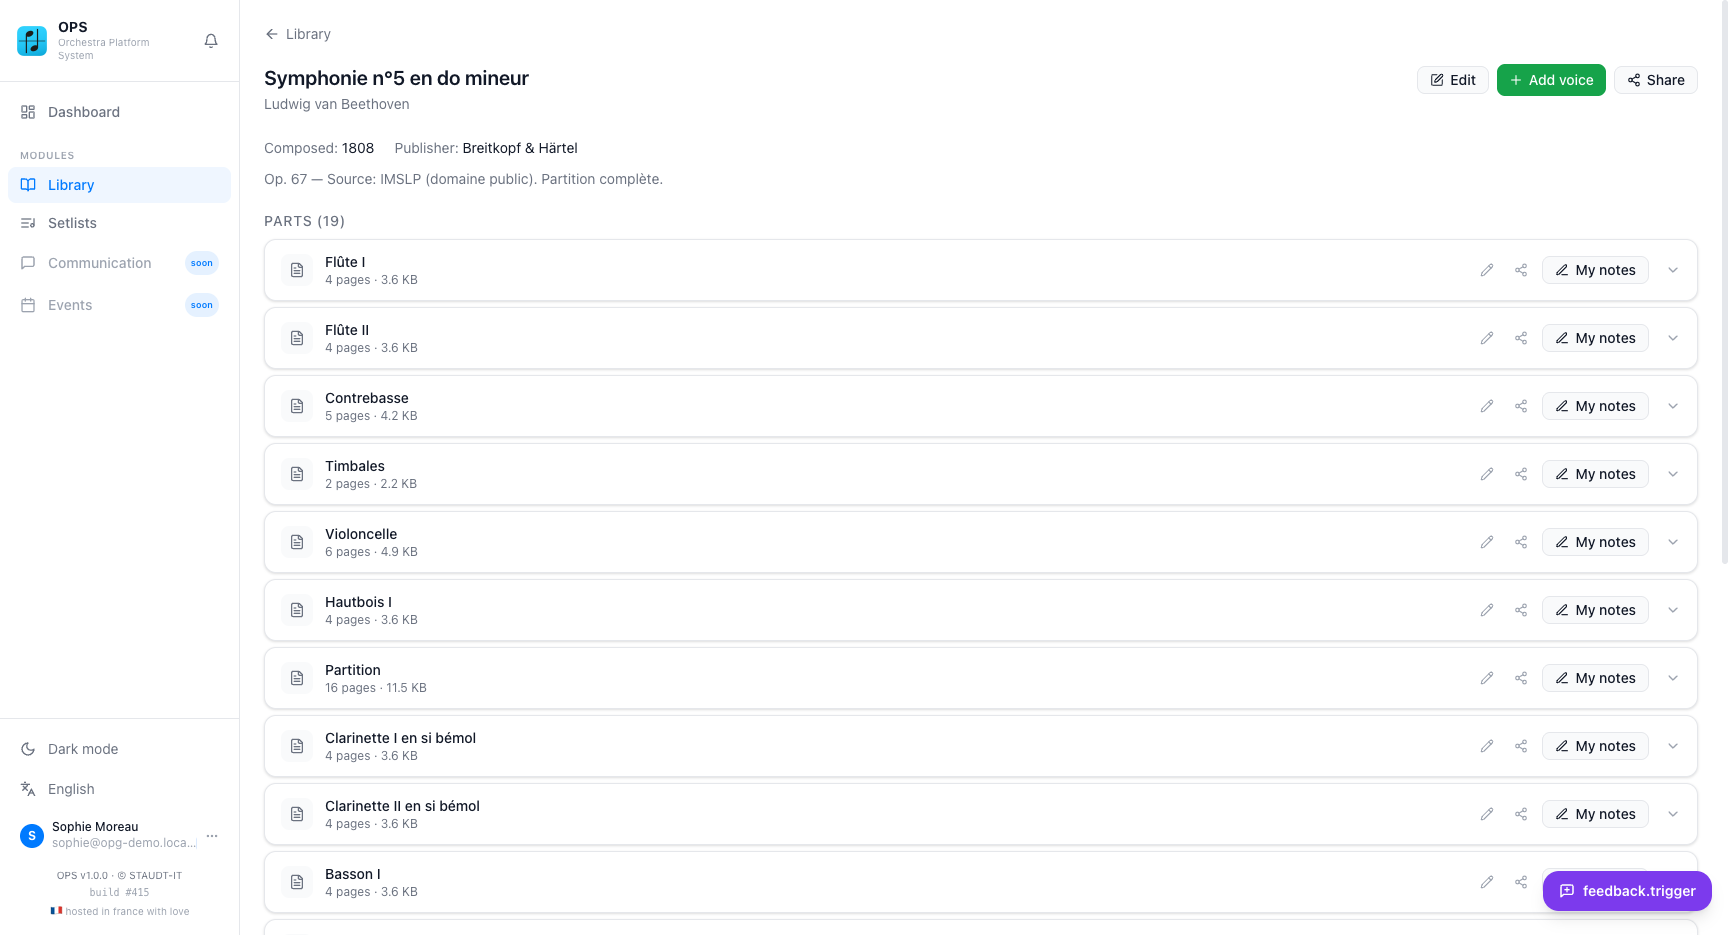
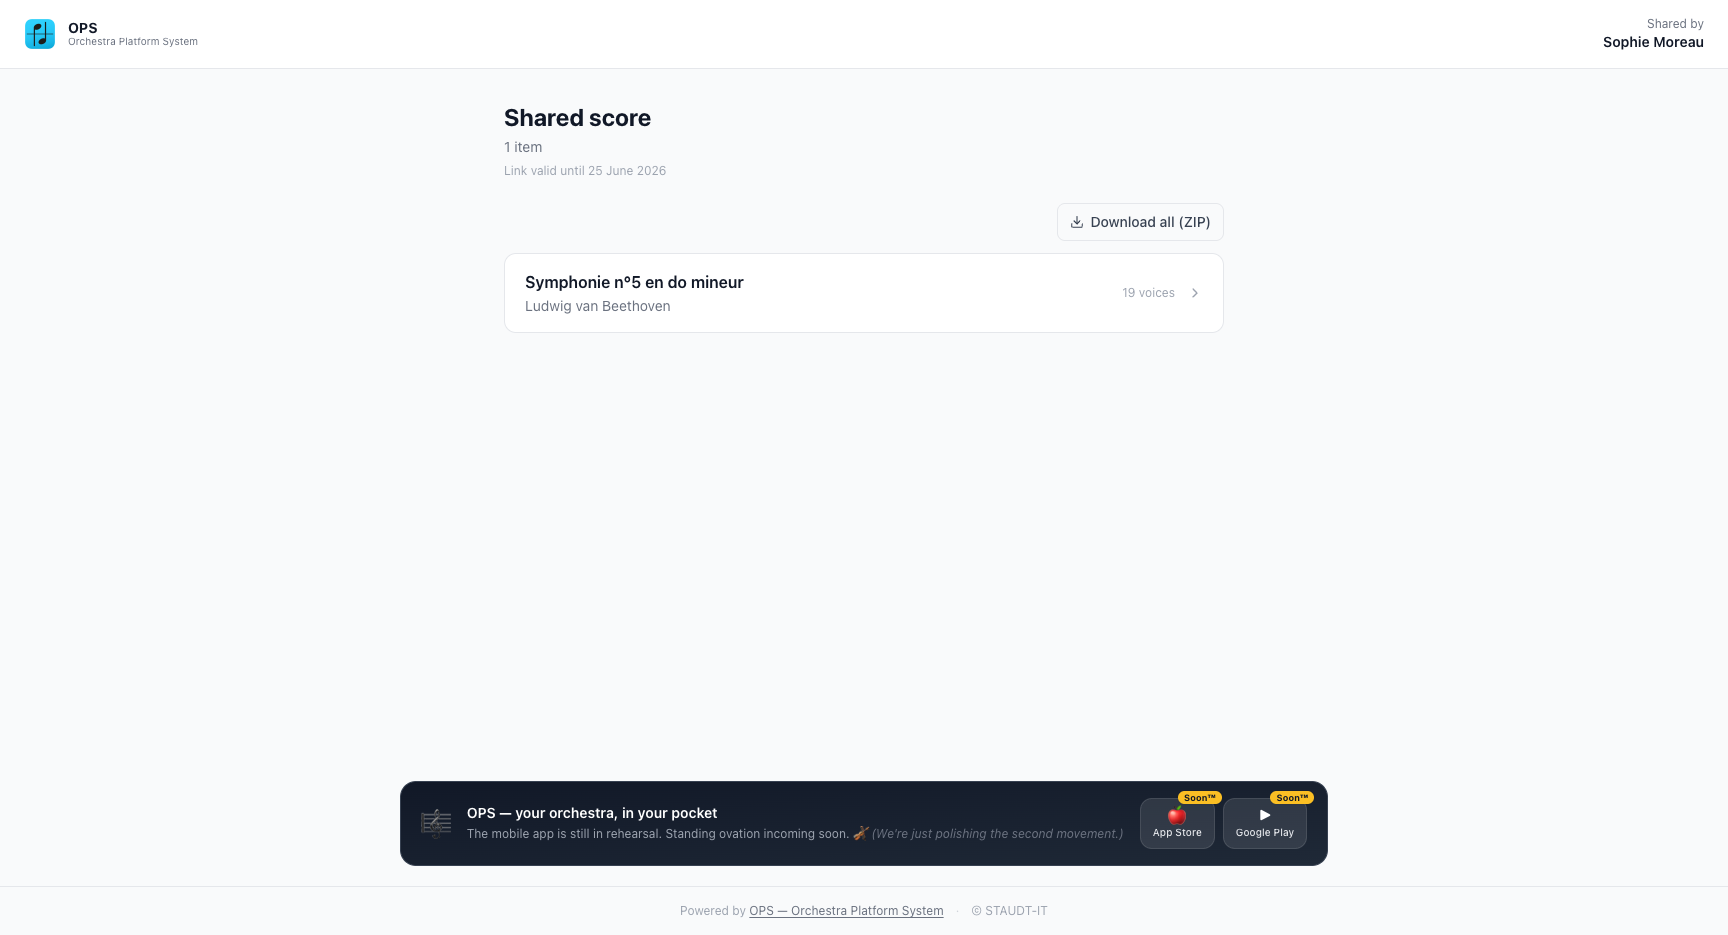
🔗 Live example
Live share link — 19 instrument parts from Beethoven's 5th, auto-extracted by OCR. Recipients download each part individually with no login required.
Contacts & Members
The Contacts module is the central directory for everyone your organisation works with: musicians, pupils, families, suppliers, and clients. Three tabs — Musicians, Pupils, and Tiers (third parties) — each show a filterable table. Clicking any row opens a slide-out detail panel where you can view and edit all fields without leaving the list. Every other module (loans, invoices, enrolments, permissions) references the same records.
What you can do
- ✓Three tabs: Musicians (performers), Pupils (students), and Tiers (suppliers, clients, authorities)
- ✓Slide-out detail panel — click any row to view and edit without navigating away from the list
- ✓Full contact info: name, email, phone, address with per-country legal fields (SIRET, etc.)
- ✓'Member since' date field for tracking tenure and anniversary reporting
- ✓Mark any contact as a pupil and link to a parent or guardian (another member, or text-only entry)
- ✓Custom fields defined in Administration appear on every contact form (text, number, date, dropdown, checkbox)
- ✓Member groups with hierarchical structure for permission assignment and mailing segments
- ✓Bulk import from CSV or Excel with column mapping and duplicate detection
- ✓Export the full contact list to Excel for mailing tools or offline backup
- ✓Create a login account for any contact via the key icon — an invite email is sent automatically
- ✓Mark contacts as inactive without deleting historical data — they disappear from active lists but remain in loans, invoices, and enrolments
- ✓Third Parties (Tiers) feed directly into Accounting — create them here first for seamless invoicing
Key workflow
- 1
Add contact
Click 'Add Member', fill in first name and last name (required). All other fields are optional and accessible from the slide-out panel.
- 2
Choose the right tab
Create performers in Musicians, students in Pupils, and suppliers/clients in Tiers. Each tab has its own default field layout.
- 3
Link pupil to parent
In the Pupils tab, open the slide-out panel, tick 'This person is a pupil', and link to a parent member or enter parent contact details manually.
- 4
Add to a group
Open the member groups panel, create groups as needed (e.g. 'Brass Section', 'Committee'), and assign the contact.
- 5
Create user account (optional)
Click the key icon on the contact row to create a login. An invite email is sent automatically with a temporary password.
- 6
Bulk import
Click Import, upload a CSV/Excel file, map the columns to contact fields, preview matches and duplicates, and confirm.
- 7
Export
Click Export on any tab to download a full Excel file of that contact type.
💡 Tips
- —Use the 'Active membership' toggle to deactivate former members — they disappear from active lists but their history in loans, invoices, and enrolments is preserved.
- —Third Parties in the Tiers tab appear as suppliers and clients in Accounting — create them here first.
- —Custom fields are shared across all three tabs. Define them in Administration for instrument family, licence number, or any organisation-specific attribute.
- —Member groups can be nested — useful for register structures (e.g. 'Strings' containing 'Violins' and 'Cellos'). Permissions assigned to a parent group cascade to sub-groups.
- —The 'Member since' date is useful for anniversary tracking and tenure-based filtering.
Instrument Inventory
Track every instrument, piece of equipment, stock item, and uniform your organisation owns — where it is, who has it, what condition it's in, and when it needs maintenance. The inventory opens with a summary dashboard showing total assets, availability, active loans, overdue returns, and maintenance due counts at a glance. Four tabs — Instruments, Equipment & Other, Stock Items, and Uniforms — organise your assets by type. A QR code on each instrument or equipment item lets anyone check its status without logging in.
What you can do
- ✓Status dashboard header: Total assets / Available / On Loan / In Repair / Overdue Returns / Maintenance Due
- ✓Instruments tab: traditional instruments with full loan, repair, and maintenance tracking
- ✓Equipment & Other tab: stands, amplifiers, cases, accessories — same loan tracking as instruments
- ✓Stock Items tab: manage consumable or bulk items (music stands, sound protectors, reeds) in batches with storage location tracking and decommission records
- ✓Uniforms tab: define uniform types (polo, vest, hat…) with size scales (standard XS–3XL or numeric like 48–58) and optional gender differentiation (M/F); track stock per size and distribute to members
- ✓Full item record: brand, model, serial number, category, purchase date, price, insurance value
- ✓Storage location tracking (room and shelf position) for fast physical retrieval
- ✓Lendable / non-lendable flag per instrument — non-lendable items open in repair view by default
- ✓Loan or rent to members with PDF contract generation and condition photo documentation
- ✓Photograph items (up to 10 photos) and record condition at loan start and at return
- ✓Repair tracking: repairer name, cost estimate, dates, notes, and PDF repair report on closure
- ✓Incident log linked to loans or repairs for a complete per-item audit trail
- ✓Maintenance scheduling with automatic 'overdue' flag when the interval is exceeded
- ✓QR code label — anyone can scan to see real-time status without logging in
- ✓Health score (0–100) calculated from condition, age, maintenance history, and incidents
- ✓Waiting list for members requesting a specific type of instrument
- ✓Uniform conflict detection: if a member already holds an unreturned item of the same type, OPS warns you and offers to record the return and issue the new item in a single step
- ✓Member profile shows active uniform allocations with type, size, gender, and date issued
- ✓Bulk import from CSV for organisations migrating from a spreadsheet inventory
- ✓Link rental invoices from the Loans tab directly to Accounting for automatic bookkeeping
Key workflow
- 1
Add instrument or equipment
Click Add in the Instruments or Equipment & Other tab, fill in brand, model, category, and initial condition. Set storage room and position.
- 2
Set maintenance schedule
Enter the maintenance interval (months) and last maintenance date — OPS flags the item as overdue when the interval is exceeded.
- 3
Record a loan
Open the item, go to the Loans tab, click 'New Loan', select a member, set start and expected end dates, and choose loan type (Loan / Rental / Borrow).
- 4
Generate contract (optional)
If contract templates are configured, click 'Generate Contract' — a stamped PDF with borrower details and item info is created automatically.
- 5
Record return
On the open loan, click Return, set the return condition and notes, and optionally upload photos of the item at return.
- 6
Record a repair
In the Repairs tab, click 'New Repair', enter repairer name, cost estimate, dates, and notes. Generate a PDF repair report on closure.
- 7
Print QR label
Open the item, go to the QR tab, and print or download the QR code. Affix it to the case or item body for instant scanning.
- 8
Add a stock item batch
Go to the Stock Items tab, click 'Add Batch', enter item type (e.g. Music Stand), name, quantity, storage location, purchase details, and save. Each batch tracks active vs. decommissioned quantity.
- 9
Decommission stock items
Open a batch, click 'Decommission', enter the quantity and reason (e.g. lost, broken). The available count updates automatically.
- 10
Define a uniform type
Go to the Uniforms tab, click 'Add Type', name it (e.g. 'Polo Shirt'), choose a size scale (standard or custom numeric), and enable gender differentiation if needed.
- 11
Set uniform stock
Expand the uniform type, click the size row, and enter total and available quantities for each size (and gender if applicable).
- 12
Distribute a uniform
Click 'Distribute', select the member and size. If the member already holds an unreturned item of that type, OPS shows a warning with the option to record the return and issue the new item simultaneously.
- 13
Record a uniform return
In the uniform type's active distributions list, click 'Return' next to the member's allocation. The available stock increments automatically.
💡 Tips
- —The status dashboard at the top updates in real time — check it before rehearsals to spot overdue returns at a glance.
- —A health score below 50 should prompt a review; items near 0 may need retirement or major repair.
- —Link instrument rentals to an accounting invoice from the Loans tab to keep financial records in sync automatically.
- —The public waiting list page requires no login — share the link on your website so families can add themselves without contacting the office.
- —Use standard size scale (XS, S, M, L, XL, XXL, 3XL) for polo shirts and vests; use numeric scale for tailored uniform pieces (48, 50, 52…) — OPS sorts sizes correctly for both.
- —Use Equipment & Other for non-instrument assets (stands, PA equipment, cabinets) — they get the same QR code, loan tracking, and repair history as instruments.
- —Stock Items are for consumable or bulk assets tracked by batch quantity, not individually — no QR code per unit, but full decommission audit trail.
Music School
A complete school management module covering the full lifecycle of a music school: enrolments, courses, timetables, attendance, grades, report cards, concerts, and parent communication — all without extra software. The module is organised into dedicated tabs for each area, with an Overview dashboard showing today's schedule and key statistics at a glance. Parents and students interact through a token-gated portal that requires no account.
Note
The Music School module is marked as beta in the application. Core features (enrolments, attendance, grades, bulletins) are stable; some reporting and concert management features are still being expanded.
What you can do
- ✓Overview tab: today's session list, enrolment totals, recent attendance rates, and activity summary
- ✓Years tab: school year management — create, open, and close academic years; one active year at a time
- ✓Enrollments tab: student enrolment records with parent/guardian info and contract signature tracking
- ✓Courses tab: course list with type (instrument, theory, orchestra, early music), assigned teacher, and recurring slot patterns
- ✓Schedule tab: weekly and monthly calendar view of all sessions across all courses
- ✓Grades tab: quarterly grade entry per student per course with comments and bulk-fill tools
- ✓Materials tab: upload PDFs or link scores from the Library directly as course materials
- ✓Concerts tab: concert events linked to the school year with student participation lists
- ✓Bulletins tab: generate and manage report cards — one stamped, archive-numbered PDF per student per quarter
- ✓Reports tab: export attendance and grade summaries by course, period, or individual student
- ✓Parent portal: share a unique token URL with parents — no login needed to view attendance, materials, and submit practice logs
- ✓Students submit practice logs (date, duration, notes) and audio/video recordings from the parent portal
- ✓Teachers leave timestamped feedback on recordings and can mark them as listened
Key workflow
- 1
Create a School Year
In the Years tab, click 'Create Year', enter dates (e.g. Sept 2025 – June 2026), and mark it as current. Only one year can be active at a time.
- 2
Create a Course
In the Courses tab, click 'New Course', choose type, name, and teacher. A parent portal token is generated automatically.
- 3
Add Recurring Slots
Inside the course, go to Slots > Add Slot, choose day of week and time. OPS auto-generates actual sessions from this pattern for the full school year.
- 4
Enrol Students
In the Enrollments tab, click 'Enrol Student', pick from your pupil list, and link a parent member or enter parent contact details.
- 5
Take Attendance
Open any session in the Schedule tab, mark each student present / absent / excused. One-click 'Mark all present' for quick full-attendance sessions.
- 6
Enter Grades
In the Grades tab, select the course and quarter, then fill in the grade grid. Comments are saved per grade cell.
- 7
Generate Bulletins
In the Bulletins tab, click 'Generate', optionally add a director's comment — one stamped PDF per student is created and archive-numbered.
- 8
Share Parent Portal
Copy the course's public token URL from the Courses tab and send it to parents. They can view attendance, download materials, and submit practice logs.
💡 Tips
- —The Overview tab shows today's sessions so you can see at a glance which courses are happening and whether any teacher is missing.
- —Course slots are recurring patterns — sessions are auto-generated instances. Delete only a single instance to cancel one session without affecting the pattern.
- —Parents access the portal with only the token URL — no account needed. Revoke access at any time by regenerating the token in the Courses tab.
- —Link scores from your Library directly as course materials — students and parents see the linked piece in the portal and can download their part.
- —Use the Concerts tab to associate end-of-year concerts with the school year and link student participation for attendance records.
Setlists
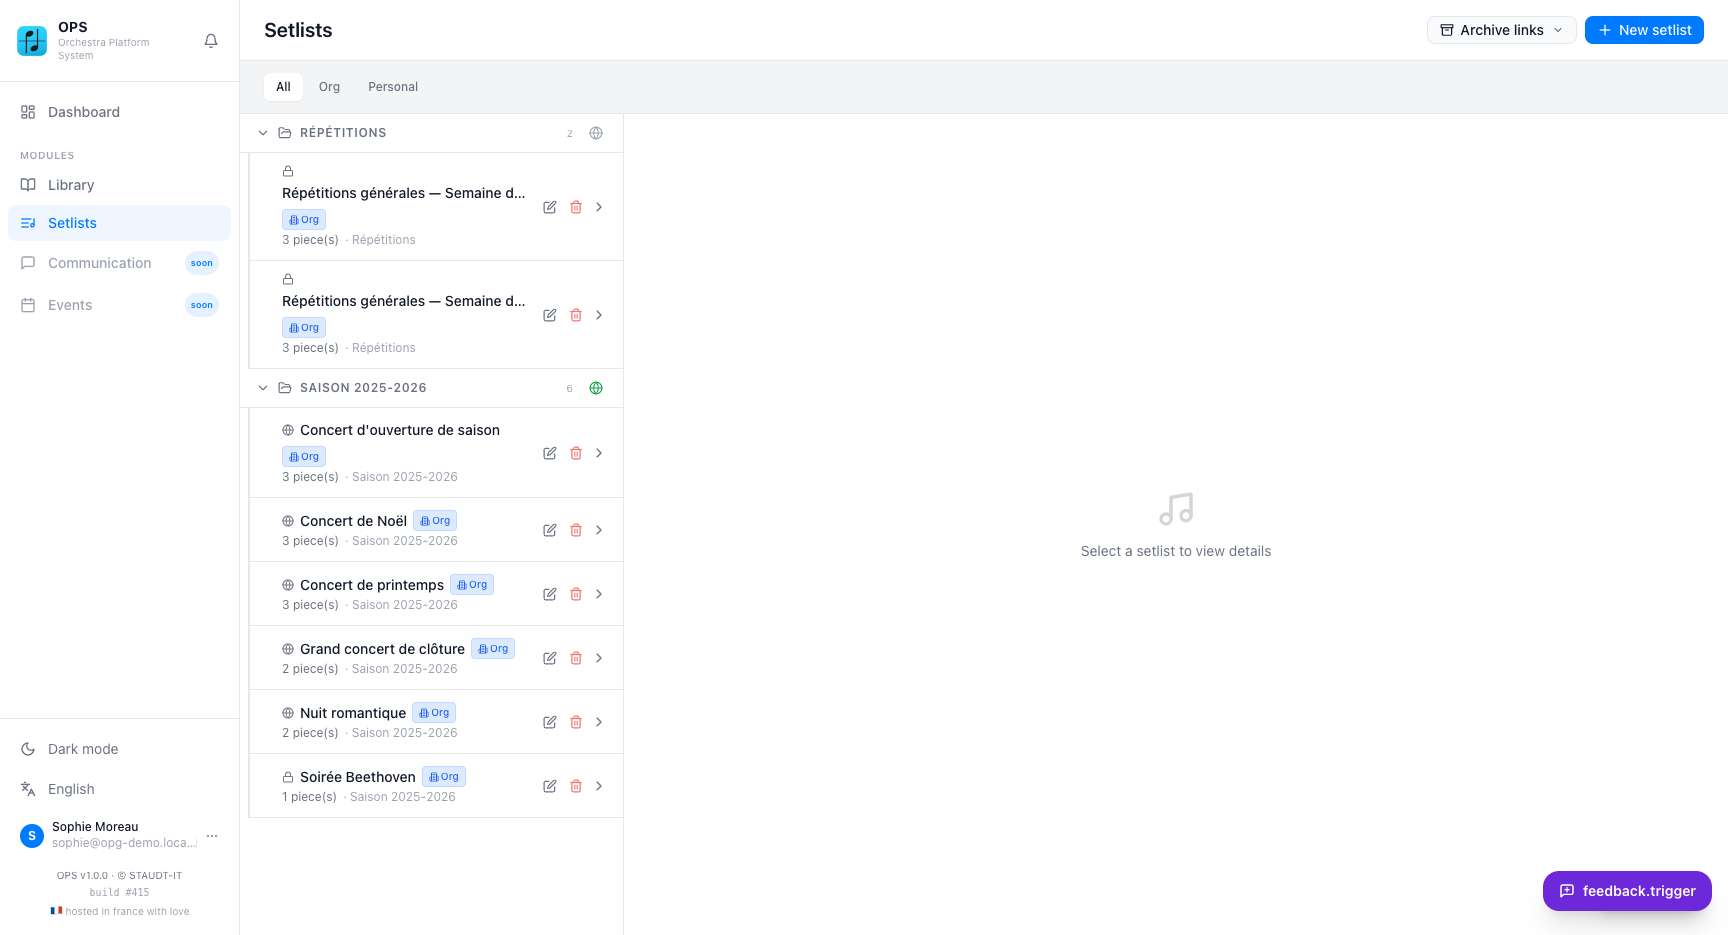
Build concert programmes from your score library, reorder pieces by drag-and-drop, and share the programme publicly with a single link — no account required for the audience. Organisation setlists can be made public at any time; personal setlists stay private until you choose to publish them.
What you can do
- ✓Create personal setlists (private) or organisation setlists (shared with all members)
- ✓Add any piece from your score library to a setlist
- ✓Drag-and-drop reordering of pieces within the setlist
- ✓Share an organisation setlist as a public link — anyone can view the programme
- ✓Invite specific users to collaborate on a setlist
- ✓Personal setlists are always private; only organisation setlists can be made public
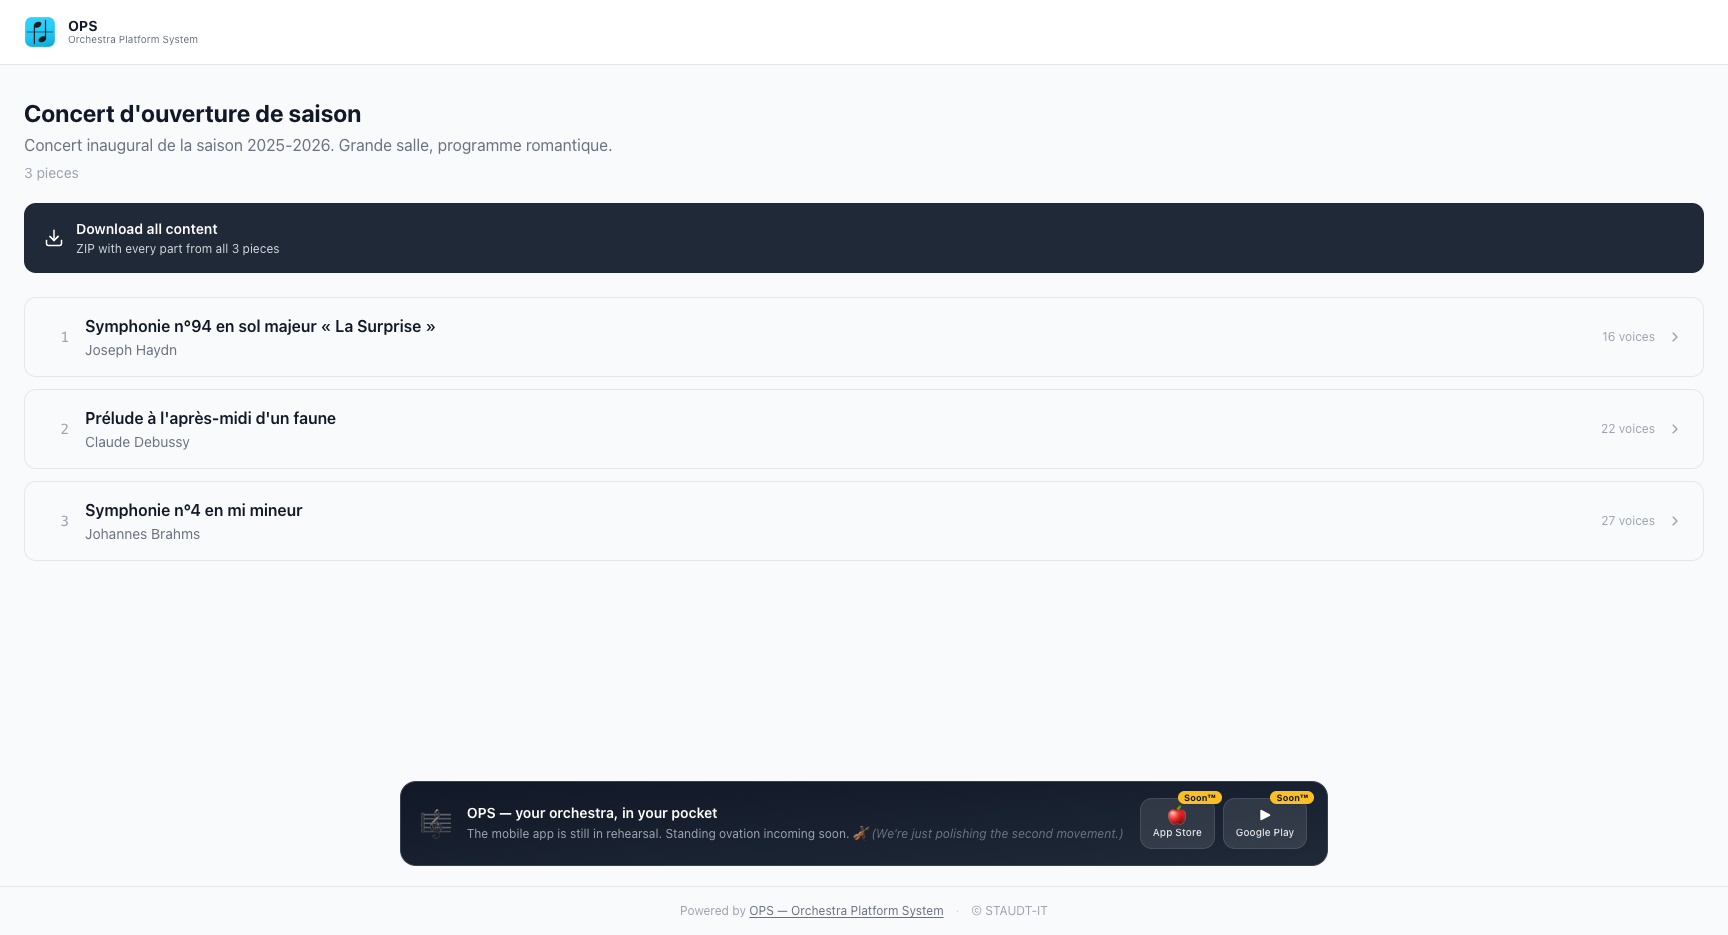
- ✓Public setlist page shows composer, arranger, and voice list — all without requiring a login
- ✓Setlists pull live data from the library — title and composer changes appear instantly
Key workflow
- 1
Create Setlist
Click 'New Setlist', give it a name, choose Personal or Organisation scope.
- 2
Add Pieces
Open the setlist, click 'Manage Pieces', search for pieces from your library, check the ones to include, and save.
- 3
Reorder
Use the Up/Down arrows on each piece row to arrange the programme in the desired order.
- 4
Share publicly
For an Organisation setlist, toggle 'Public' — copy the share link and send it to your audience or post it on your website.
- 5
Embed on your website (optional)
Add '?embed=1' to the share link and use it as an iframe src. The embedded view hides the OPS navigation and focuses on the programme.
💡 Tips
- —Setlists pull live data from the library — if you update a piece's title, the setlist reflects it immediately.
- —Use personal setlists to prepare a programme privately before publishing it as an organisation setlist.
- —Copy the public link and add it to your concert event page or send it in a newsletter so your audience always has the latest programme.
🔗 Live example
Live setlist — Concert d'ouverture de saison with 3 pieces. The audience can browse each programme entry and download a ZIP of all parts.
Mobile Apps
OPS extends to native mobile apps for on-the-go management and score reading. Whether you're checking inventory in the instrument room or reading sheet music on stage, there's a dedicated app for it.
OPS Mobile
iPhone · iOSFull orchestra management in your pocket
The complete OPS experience on iPhone. Manage your orchestra between rehearsals — scan instruments, check members, review accounting, and browse the score library, all from your phone.
- ✓Multi-org login — switch organisations without logging out
- ✓QR code scanner — tap a label, open the instrument record instantly
- ✓Inventory: add instruments, log loans, track repairs and stock
- ✓Members: browse contacts, view uniform allocations
- ✓Library: search scores, view voice lists, download parts
- ✓Accounting overview: balances, recent entries, outstanding cheques
OPS Scores
iPad · iPadOSYour parts on iPad, with Apple Pencil
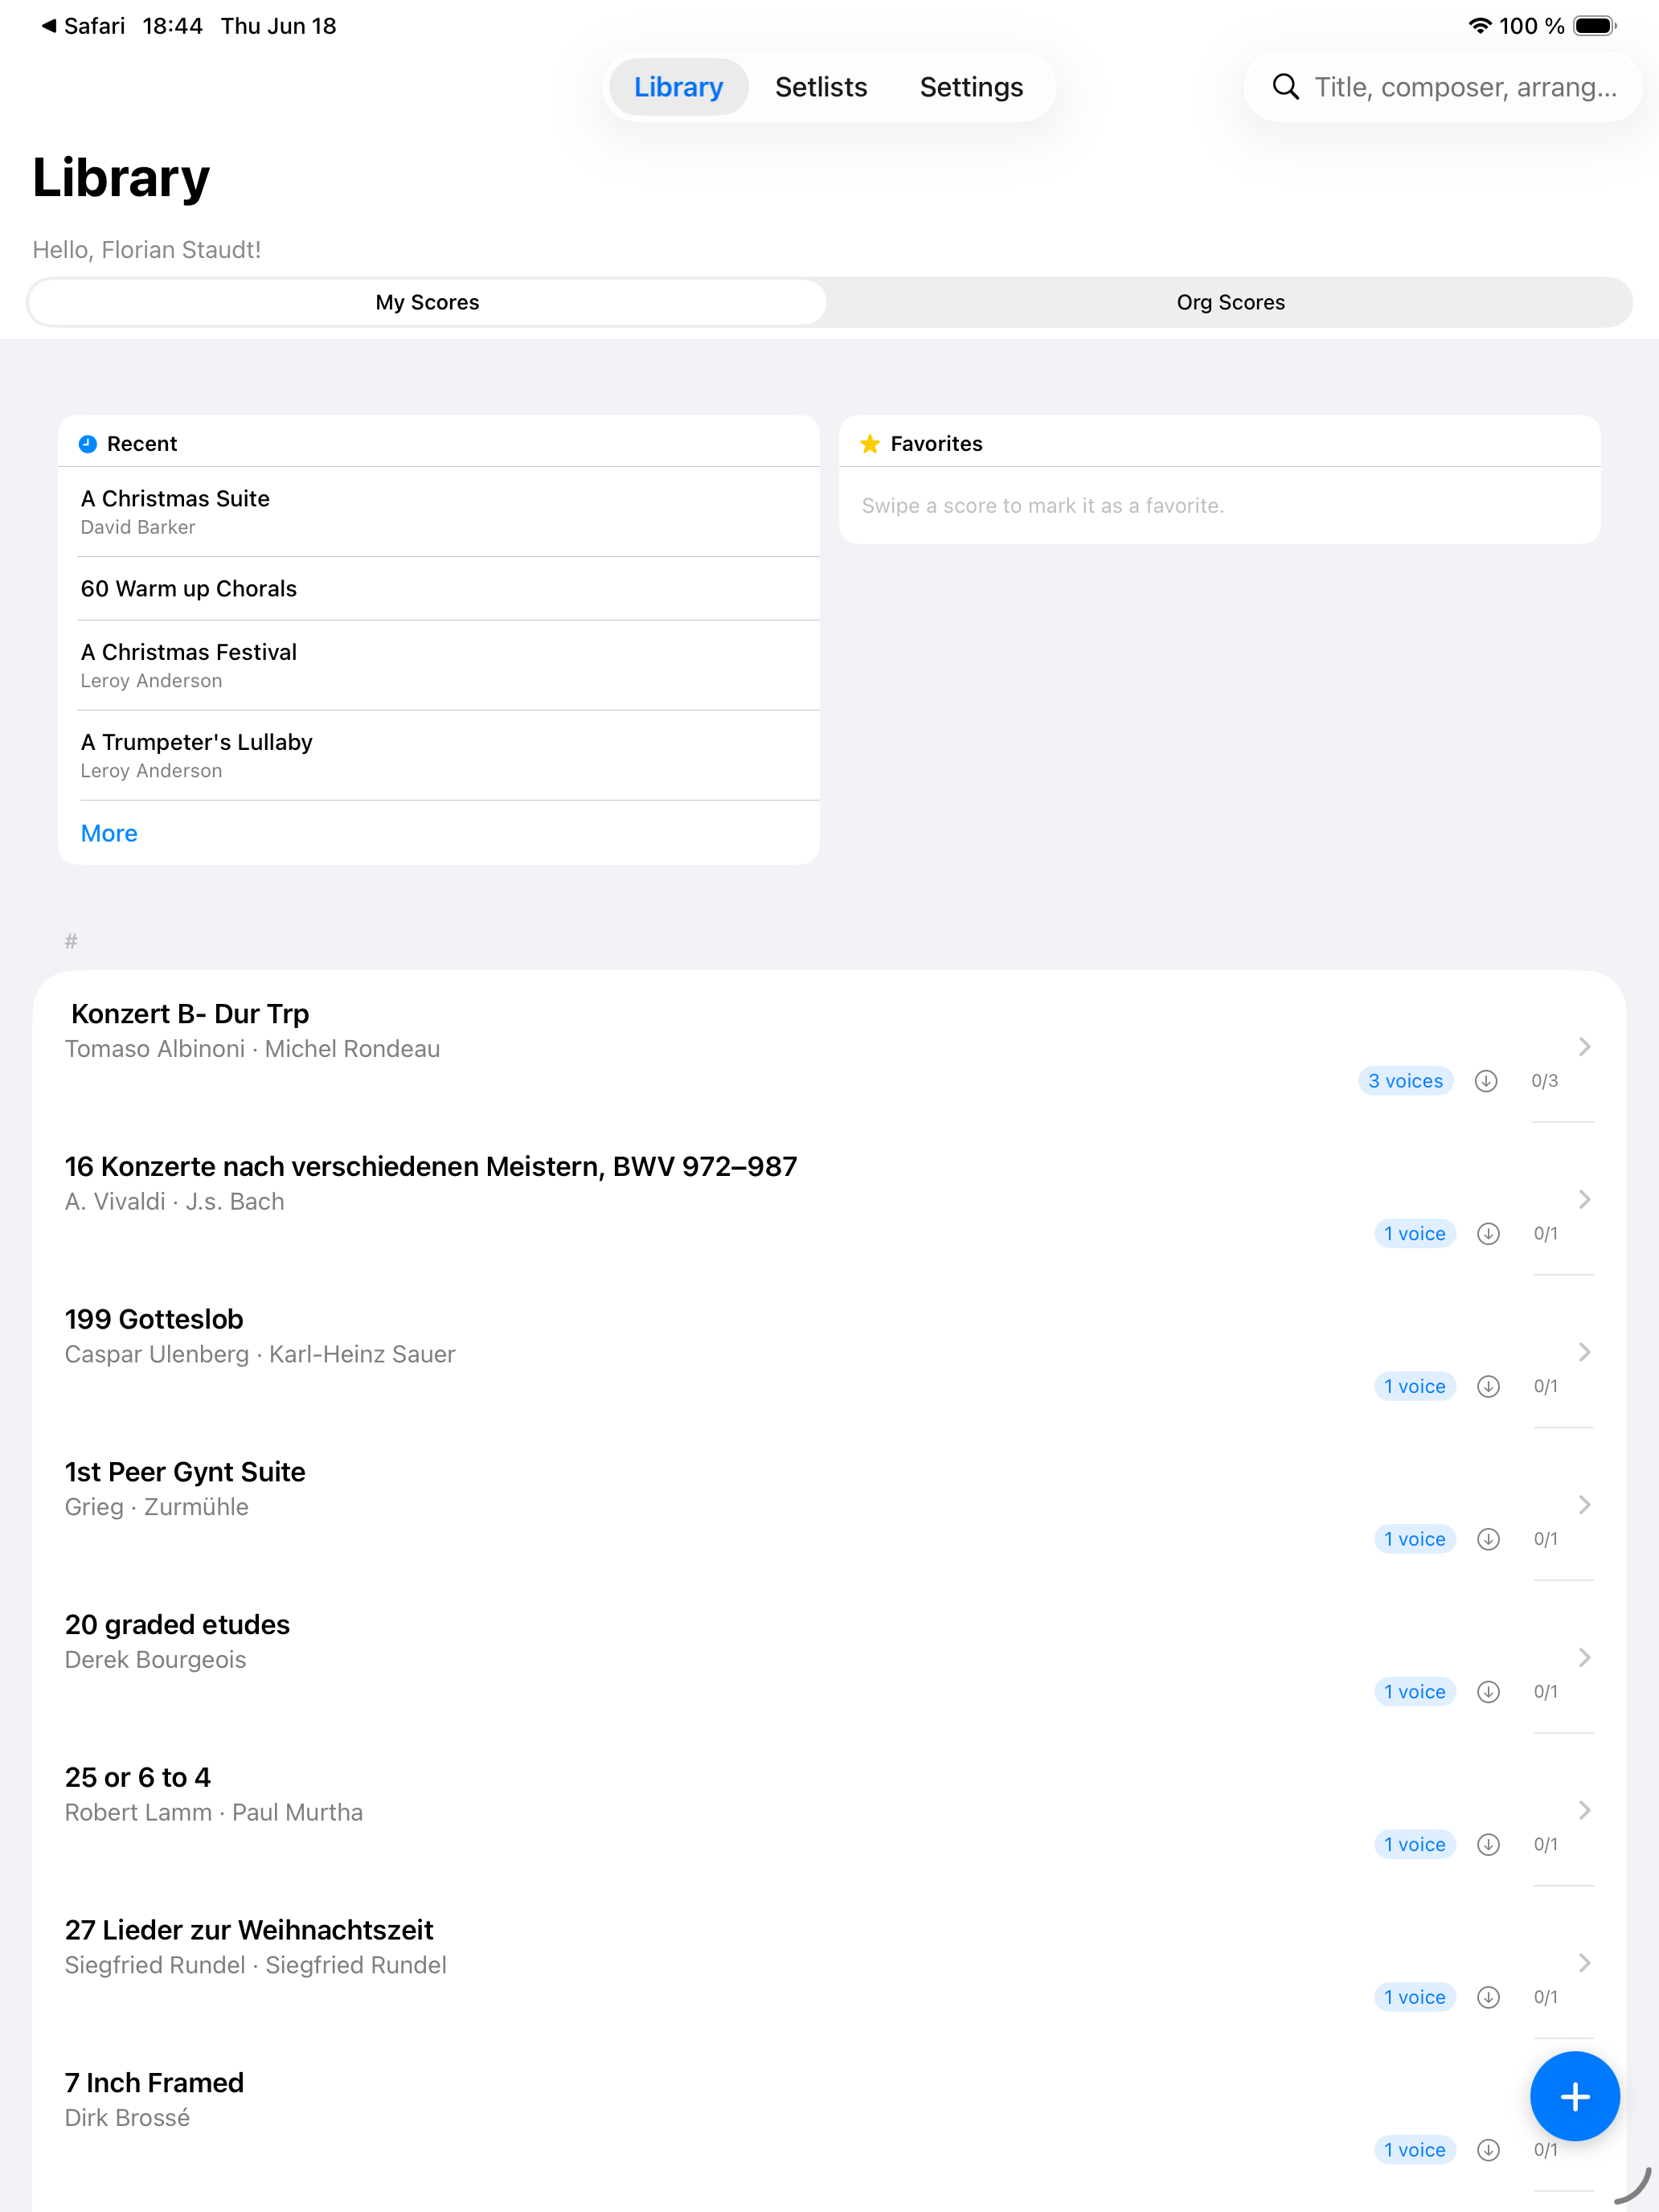
A dedicated iPadOS score reader built for rehearsals and concerts. Sync your library with one tap, download parts for offline access, and annotate directly on the PDF with Apple Pencil.
- ✓Syncs automatically with your OPS account — no manual import
- ✓Full-screen PDF reader optimised for iPad
- ✓Apple Pencil annotations: highlights, fingerings, bowings, notes
- ✓Offline-first: downloaded scores work with no Wi-Fi
- ✓Annotations are layered — the original PDF is never modified
- ✓Setlist view: navigate directly to pieces in tonight's programme
Document Management
The Document Management module is a centralised archive for all official documents produced or received by your organisation: letters, contracts, programmes, authorisations, invoices, and more. Every document is automatically assigned a structured archive number in the format YYYY-YYYY/TYPE/NNNN (e.g. 2024-2025/COR/0001), making retrieval fast and auditable. Three tabs — Documents, External Contacts, and Templates — cover the full workflow, supported by a collapsible left sidebar for navigation by type or fiscal period.
What you can do
- ✓Automatic archive numbering per fiscal period and document type: YYYY-YYYY/TYPE/NNNN (e.g. 2024-2025/COR/0001)
- ✓Left sidebar with New document button, Mass import, Inbox (received/unclassified documents), All documents, and accordion sections By Type and By Period
- ✓Built-in document types: Letters (COR), Contracts (CTR), Programmes (PRG), Authorisations (AUT), Invoices (FAC), and configurable custom types
- ✓AI-assisted classification: OPS suggests the document type based on file content on upload — review and confirm before saving
- ✓Upload individual PDFs, Word files, or images; mass import from a ZIP archive with per-file classification review
- ✓External Contacts tab: manage organisations and individuals linked to documents (suppliers, authorities, partner organisations)
- ✓Templates tab: store reusable DOCX or PDF templates for consistent outgoing correspondence
- ✓Signature tracking: set document status (Draft / Sent / Signed / Archived) and record when signatures were collected
- ✓Link any document to a specific external contact — their profile then shows every document exchanged with them
- ✓Full-text search across document titles, archive numbers, and linked contact names
- ✓Filter the document list by type, period, status, or external contact
- ✓Download the original file or export a clean PDF rendering at any time
Key workflow
- 1
Upload a document
Click 'New' in the sidebar or toolbar, choose a file. OPS analyses the content and suggests a document type via AI classification. Confirm or override the type.
- 2
Review the archive number
OPS auto-assigns a number from the active fiscal period and type counter (e.g. 2024-2025/COR/0012). You can override the number before saving if you are migrating existing records.
- 3
Link an external contact
In the document form, search for an existing external contact or create one on the fly. All documents linked to that contact group under their profile in the External Contacts tab.
- 4
Set signature status
If the document requires signatures, set status to 'Sent' and note who needs to sign. Update to 'Signed' when all signatures are collected; 'Archived' when filed.
- 5
Mass import
Click 'Mass import' in the sidebar, upload a ZIP of documents. OPS creates a record for each file with AI-suggested types — review and confirm each before saving.
- 6
Browse by type or period
Use the 'By Type' and 'By Period' accordions in the sidebar to narrow the list to a specific category or fiscal year instantly.
- 7
Add a template
In the Templates tab, upload a DOCX or PDF template, give it a name and type. It will appear as a starting point when creating new documents of that type.
💡 Tips
- —Archive numbers are permanent once assigned and cannot be changed — make sure the document type is correct before saving.
- —Use the External Contacts tab to track all correspondence with a given authority (town hall, prefecture, insurer). Their profile shows every document linked to them.
- —The Inbox is a staging area for received documents not yet classified. Process it regularly to keep the archive tidy.
- —AI classification is a suggestion — always verify the detected type, especially for new or unusual document formats.
- —Templates save time for recurring documents such as membership certificates or booking requests: create the template once and generate instances from it as needed.
Accounting
A full double-entry bookkeeping module built specifically for French associations, following the Plan Comptable Général adapté aux associations (PCG). The accounting dashboard shows income and expenses as a grouped bar chart by month alongside a cash flow forecast line. Nine tabs cover every accounting workflow: Entries, Cheques, Invoicing, Purchases, Bank, Reconciliation, Budgets, Reports, and Settings. All generated documents are stamped with an archive number and QR code.
Note
The Accounting module follows the Plan Comptable Général adapté aux associations (PCG) and is currently available for French-language organisations. Consult your accountant before closing a fiscal year or exporting the FEC.
What you can do
- ✓Fiscal year management: open, in closing, and closed states — no entries can be created in a closed year
- ✓Standard French chart of accounts (PCG for associations) pre-loaded, fully customisable per account
- ✓Multiple treasury accounts: bank, cash, digital (PayPal, Stripe, etc.) with IBAN/BIC tracking
- ✓Double-entry journal with journal codes (OD, AC, VE, TR, and custom codes)
- ✓Entries tab: filter by All / Revenue / Charge / Transfer / Manual entry; see journal code, date, label, debit/credit accounts, and amount per line
- ✓Cheques tab: track received cheques (emitter, amount, receipt date, bank, cashing date) and issued cheques; statuses: Pending / Deposited / Cashed / Cancelled
- ✓Invoicing tab: product and service catalogue with unit prices and TVA rates; invoice lifecycle Draft → Sent → Paid; credit note support; stamped PDF generation
- ✓Purchases tab: record supplier invoices with reference, date, amount HT/TTC, TVA rate, and payment status; journal entry generated automatically
- ✓Bank tab: configure treasury accounts, import bank statements (CSV), view account balances
- ✓Reconciliation tab: match journal entries to bank transactions pair-by-pair; validate when the period balances
- ✓Budgets tab: hierarchical budget lines with actual vs. forecast tracking and variance reporting
- ✓Reports: Grand Livre, Balance Générale, Compte de Résultat, Bilan — all exported as archive-numbered stamped PDFs
- ✓FEC (Fichier d'Échanges Comptables) export for tax authority audits
- ✓Journal entry templates for recurring transactions (rent, salaries, subscriptions)
Key workflow
- 1
Create a Fiscal Year
Go to Accounting > Settings, click 'New Fiscal Year', enter name (e.g. '2025'), start and end dates, and open it.
- 2
Configure treasury accounts
In the Bank tab, click Add Account. Enter name, type (Bank / Cash / Digital), optional IBAN/BIC, and opening balance.
- 3
Add third parties
Third parties (suppliers and clients) are managed in the Contacts module (Tiers tab) and automatically available in Accounting for invoicing.
- 4
Create journal entries
In the Entries tab, click 'New Entry'. Choose journal code, date, label, then enter debit and credit lines. Total debit must equal total credit.
- 5
Record cheques
In the Cheques tab, log received cheques on arrival (emitter, amount, date) and mark as Deposited or Cashed as they clear the bank. Issue cheques for supplier payments similarly.
- 6
Record supplier invoices
In the Purchases tab, click 'New Purchase'. Select the supplier, enter their invoice reference, date, and line amounts with TVA. OPS generates the journal entry automatically.
- 7
Create sales invoices
In the Invoicing tab, click 'New Invoice'. Select a client, add product/service lines from the catalogue, set TVA rates. Send the PDF and track payment status.
- 8
Import bank statement
In the Bank tab, select an account and click Import Statement. Upload the bank's CSV — transactions appear in the Reconciliation view.
- 9
Reconcile
In the Reconciliation tab, click a journal entry and its matching bank transaction to pair them. Validate the period when all transactions are matched.
- 10
Generate reports
In the Reports tab, choose report type and date range, then export as PDF. Each is archive-numbered and QR-stamped.
- 11
Export FEC at year-end
Before closing the fiscal year, go to Reports > FEC Export. Download and archive this file — French tax authorities require it during audits.
💡 Tips
- —You cannot create entries in a closed fiscal year. Close it only when all entries are final and the FEC has been exported.
- —Use the Cheques tab to avoid cheques falling through the cracks — log them on receipt and update status as they clear.
- —The Purchases tab auto-generates a journal entry when you record a supplier invoice — no need to create the accounting entry separately.
- —Use journal entry templates (Settings tab) for recurring transactions such as monthly rent or salary payments.
- —Budget lines can be hierarchical — create a top-level 'Events' budget and add child lines per event for granular tracking.
- —Store exported FEC files in the Document Management archive alongside the fiscal year's official documents.